How To Plan A Beginner Composting Corner That Stays Tidy
A practical step-by-step guide to how to plan a beginner composting corner that stays tidy, including preparation, instructions, common issues, tips, and next steps.
How To Plan A Beginner Composting Corner That Stays Tidy
Creating a tidy composting corner at home is easier than you think. This guide walks you through choosing a discreet spot, gathering the right tools, layering browns and greens correctly, and maintaining a balance that avoids odors and pests. You will learn how to manage moisture, turn the pile effectively, and know when your compost is ready. With a focus on practical steps and common-sense checks, you'll keep your corner neat and your compost healthy, all while reducing kitchen waste responsibly.
Fast Answer
- Choose a small, shady, well-drained spot away from your main traffic areas, then set up a lidded bin on bare soil or a pallet to keep things neat and simple.
- Layer about 2 parts brown materials (dry leaves, cardboard) to 1 part green materials (kitchen scraps, grass clippings), keep it as moist as a wrung-out sponge, and turn it every week or two.
Before You Start
- Find a level spot that gets partial shade and has good drainage, so your pile won't get waterlogged or dry out too quickly; clear away weeds or grass to create a bare patch.
- Gather your container options: you can use a store-bought compost bin with a lid, or build a simple frame using wooden pallets or wire mesh; choose based on your space and needs.
- Collect brown materials like dry leaves, straw, shredded paper, and cardboard, and store them in a dry place so they are ready to mix with kitchen scraps and green waste.
- Get a small countertop pail with a lid for collecting kitchen scraps, and have a garden fork or compost aerator on hand to turn the pile and keep it well mixed.
Step-by-Step Instructions
Select a tidy, discreet location for your bin
Walk around your yard and identify a spot that is not right next to your door but is still convenient for daily kitchen scrap drops. Look for level ground that does not collect puddles after rain, and prefer a place with some shade from trees or a fence, since direct sun can dry the pile too fast. Avoid low areas where water pools, as soggy conditions make a mess and angry odors. Mark a space that is about 1 meter square, and clear away grass or weeds down to the soil. Check that the spot is easily reachable with a wheelbarrow or bucket so you are not tempted to toss scraps in from a distance. This positive first meeting with your corner sets the foundation for tidiness because if it is hard to reach, you will neglect it, and neglect breeds chaos.
Set up a bin or frame with a secure lid
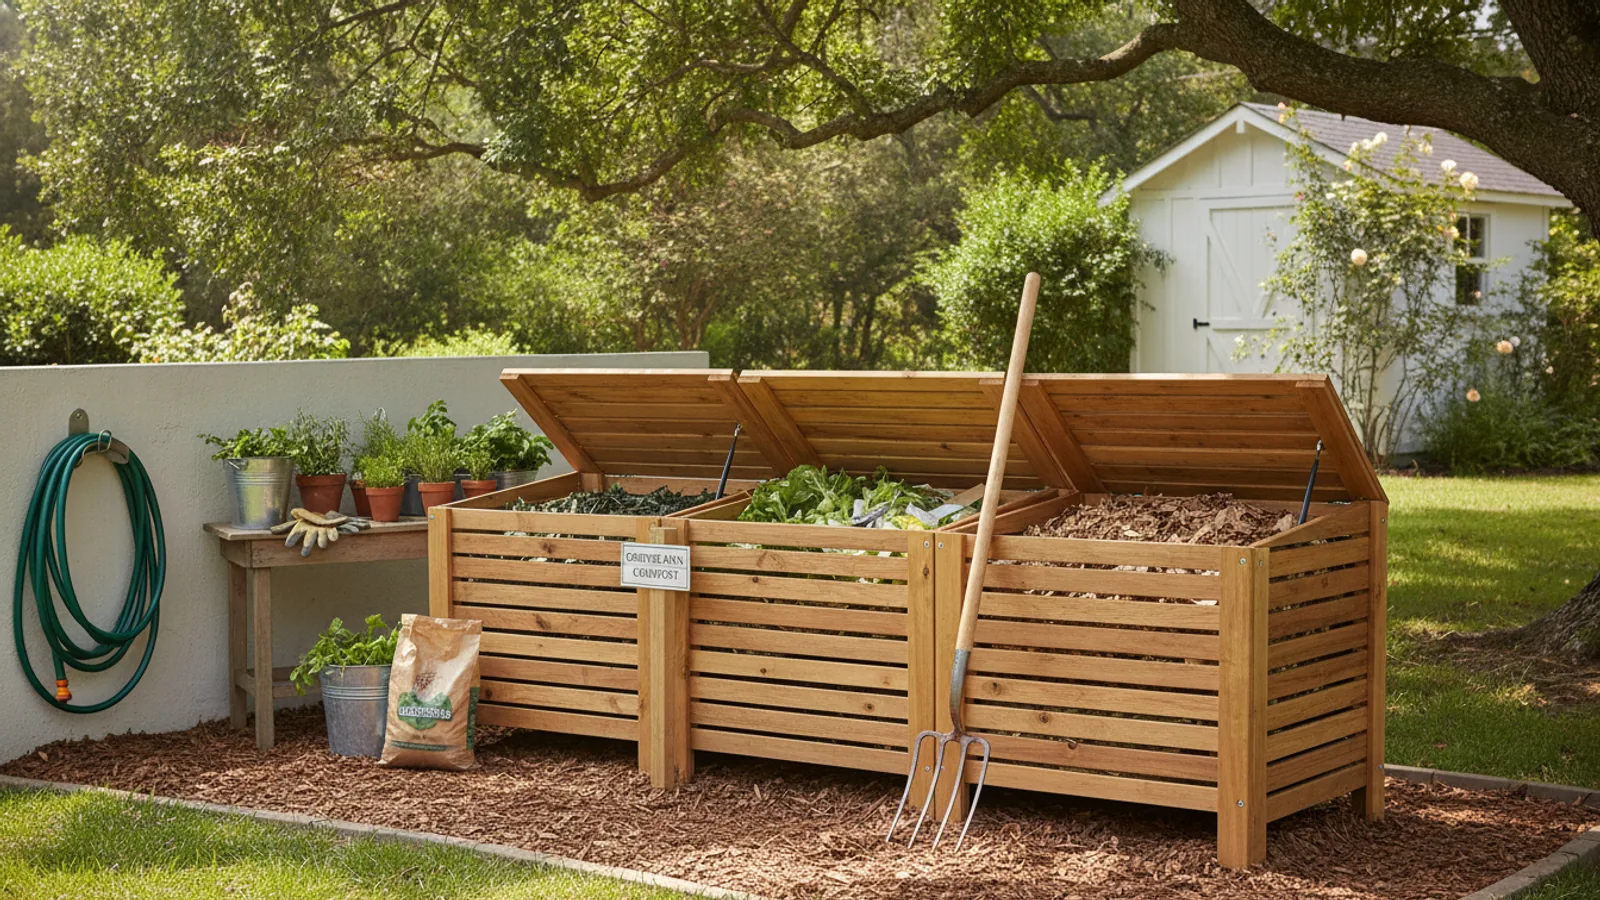
Place your chosen bin or frame on the cleared patch. If you are using a store-bought bin, follow the instructions to assemble it and make sure it has a lid that closes firmly. If you prefer a DIY structure, build a simple three-sided enclosure using wooden pallets or wire mesh, and cover the top with a heavyweight tarp or a fitted wooden board to keep out rain and animals. Check that the bin has good contact with the soil; if you are on concrete or pavement, layer 10 to 15 centimeters of soil or finished compost at the bottom to introduce native microbes. Give the structure a little shake to ensure it is stable. A secure lid is your number one defense against pests and rot, so test that it latches and stays put on windy days, because a wandering lid invites trouble and breeds mess.
Start your base layer with brown materials
Begin filling your bin with a generous layer of brown materials, about 15 centimeters deep. Use dry leaves, straw, shredded paper, or cardboard torn into small pieces. This first layer is critical because it absorbs excess moisture from the green materials you will add later, and it creates air pockets that encourage beneficial aerobic bacteria. Spread the browns evenly across the bottom of the bin. Then add a thin layer of soil or finished compost to introduce decomposers and to help keep odors in check. Water this base layer lightly until it feels like a wrung-out sponge, but do not soak it. The right moisture level is essential because too much water drowns the microbes and too little stops them from working. A proper base reduces future smell issues and starts your pile on the right track.
Add kitchen scraps and cover with browns each time
When you bring out your kitchen pail, empty the contents onto the pile in a thin layer, spreading it around. Immediately cover the scraps with a sprinkle of the brown materials you stored, about 2 to 3 centimeters thick. This burying technique is the key to a tidy corner: it masks the food from fruit flies and scavengers, it balances the moisture your greens bring, and it keeps smells from rising. Think of each addition as a sandwich, where the greens are the filling and the browns are the bread. Alternate layers of greens and browns, keeping the ratio roughly 1 part green to 2 parts brown by volume. Check that every scrap is fully covered before you walk away. This simple habit reduces pest invasions and keeps your pile from becoming a soggy, smelly blob.
Turn the pile every week to keep it aerated
Once a week, use a garden fork or compost aerator to turn the pile. Push the tool in and lift and mix the outer materials into the center, where the heat is highest. The goal is to bring fresh oxygen to the microbes and redistribute moisture and microorganisms. If the pile feels too dry, sprinkle water as you turn; if it feels soggy, add more brown materials and stir them in. Turning also breaks up clumps and accelerates decomposition, so you get usable compost sooner. Check the temperature with your hand: a warm center means the microbes are active, while a cool pile might need a bit of nitrogen-rich green or a little water. This weekly check is your early warning system, preventing common issues like stench and slow decomposition before they take hold.
Monitor moisture and adjust your routine
Regularly check the moisture level by squeezing a handful of compost from the middle of the pile. It should feel like a wrung-out sponge, producing a few drops of water when squeezed, but not dripping. If it is too dry, add water with a watering can and turn the pile. If it is too wet, add brown materials and turn to incorporate. Also watch for odors: a sour or ammonia smell suggests too many greens, so add more browns. A pleasant earthy smell is a sign of a healthy pile. Keep an eye on the texture as well, and you will notice the material darkening and turning into crumbly humus. This ongoing attention keeps your corner neat and your compost productive. Because every climate is different, make these adjustments based on what you see and feel.
Quick Reference
| Situation | Action | Why it helps |
|---|---|---|
| Fruit flies are hovering around your compost corner, especially after you add a fresh batch of kitchen scraps. | Immediately cover the scraps with a thick layer of brown materials, at least 5 centimeters deep, and bury any exposed food completely. | Fruit flies need access to fresh food to lay eggs, so a solid brown cover blocks that access and disrupts their breeding cycle. |
| Your compost smells like rotten eggs or ammonia, and you worry it is turning into a soggy mess. | Turn the pile thoroughly with a fork, and mix in dry browns like shredded cardboard or leaves until the moisture feels like a wrung-out sponge. | Sour odors come from oxygen-starved anaerobic bacteria; turning adds air and dry browns soak up excess moisture, restoring the right conditions. |
| Your pile is not heating up or breaking down, and it looks just like the day you started it a month ago. | Check that you have a good balance of green and brown materials, then water the pile lightly and turn it to mix everything together. | Decomposition stalls when there is too much carbon (browns), too little nitrogen (greens), or not enough moisture; adjusting all three restarts microbial activity. |
Common Issues
- Unpleasant smells coming from the pile, such as ammonia, rotten eggs, or a sour odor.: Add more brown materials, like dry leaves or shredded paper, and turn the pile to aerate it. Avoid adding meat or dairy and ensure you always cover fresh greens with browns.
- Noticeable pests like rats, raccoons, or insects are digging into your compost.: Secure the lid with a bungee cord or weights, and stop adding food scraps that attract animals. If pests continue, relocate the bin away from your living space and consider using a closed bin with a tight-fitting lid.
- The pile is dry and brittle, with little decomposition activity.: Water the pile thoroughly, turning it as you water to distribute moisture. Add fresh green materials or a bit of garden soil to boost nitrogen and microbial life, then monitor regularly.
Advanced Tips
- Use a compost thermometer to track internal temperature; aim for 55-65°C (130-150°F) to ensure efficient breakdown, but do not obsess over exact numbers.
- Create a 'compost tea' by steeping a bag of finished compost in water for 24 hours; use the liquid to feed your plants, but always dilute it and use it promptly.
- Try adding a handful of finished compost from a previous batch to introduce beneficial microbes; this can speed up the start of a new pile.
Final Checklist
- Set up your bin in a stable, partly shaded location with good drainage and easy access for daily use.
- Maintain a 2:1 ratio of brown to green materials, and always cover kitchen scraps with browns after each addition.
- Check moisture weekly, aiming for a wrung-out sponge feel, and turn the pile every 7-10 days to keep air flowing.
- Monitor for odors, pests, or slow decomposition, and adjust your materials and watering based on what you observe.
FAQ
How long does it take to get finished compost?
With regular turning, proper moisture, and a good balance of materials, you can expect compost in about 2 to 4 months. In warmer seasons it may be faster, and in colder months it slows down. You know it's ready when it looks dark, crumbly, and smells earthy, with no recognizable scraps.
Can I compost in the winter or in a cold climate?
Yes, you can compost year-round, but breakdown slows in cold weather. To help, chop materials into small pieces, insulate your bin with a layer of straw or a blanket, and keep adding scraps but be patient. In spring, you'll find a partially finished pile that will heat up again as temperatures rise.
What should I do if my compost becomes too wet and smelly?
Turn the pile thoroughly with a fork to aerate it, and mix in dry browns like shredded cardboard or leaves to soak up the moisture. Remove any soaking-wet materials if necessary, and ensure the bin has drainage. Going forward, avoid adding too many watery greens and always balance with browns.