A Pollinator Friendly Border For A Compact Garden Checklist For First Time Readers
A practical step-by-step guide to a pollinator-friendly border for a compact garden checklist for first-time readers, including preparation, instructions, common issues, tips, and next steps.
A Pollinator Friendly Border For A Compact Garden Checklist For First Time Readers
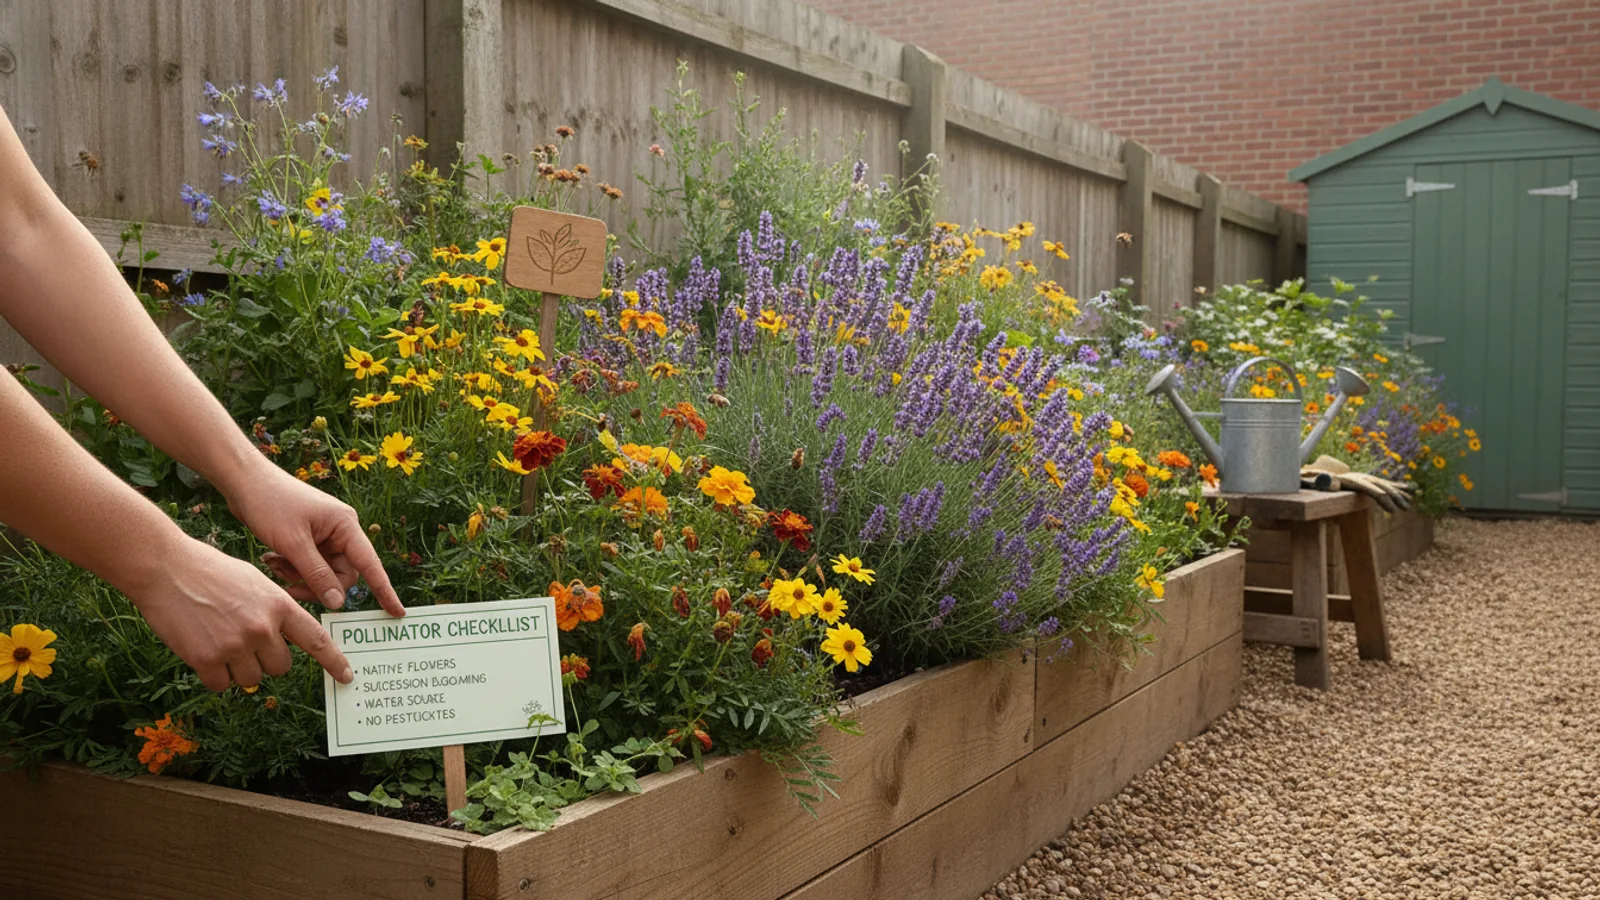
This guide provides a clear, step-by-step plan to create a pollinator-friendly border in a compact garden. It is designed for first-time readers, offering practical advice on plant selection, soil preparation, and maintenance. By following these steps, you will support local pollinators such as bees, butterflies, and beneficial insects, while enjoying a vibrant and low-maintenance garden space. The guide includes a prep checklist, six detailed steps, troubleshooting tips, and a quick-reference table for common situations.
Fast Answer
- Choose a sunny spot and prepare the soil by removing weeds and adding compost. Select a mix of native flowering plants that bloom from spring to fall, and plant them in clusters. Provide a water source and avoid pesticides.
- In a compact border, use a layered design with tall plants in the back, medium in the middle, and low groundcovers in the front. Deadhead spent flowers to encourage more blooms, and leave some seed heads in autumn for winter interest.
Before You Start
- Select a location that receives at least 6 hours of sunlight daily, as most pollinator-friendly plants thrive in full sun. Observe your garden to find the sunniest spot.
- Clear the area of existing weeds and grass. Use a spade or garden fork to loosen the soil to a depth of 8-10 inches, removing rocks and roots.
- Amend the soil with 2-3 inches of compost or aged manure, mixing it thoroughly. This improves drainage and provides nutrients for strong root growth.
- Plan your plant palette: choose at least 5 different native species with overlapping bloom times, ensuring color from early spring to late fall. Consider a mix of annuals and perennials.
Step-by-Step Instructions
Measure and Mark the Border
Use a tape measure to outline your border, then mark it with a garden hose or string. A compact border can be as small as 3 feet by 8 feet, but the key is to match the space you have. Step back and adjust the shape so it feels proportional to your garden. Remove sod and dig under the edges to create a clean line. This step ensures you know the exact area for planting and helps you determine how many plants you'll need. Having a defined edge also makes future maintenance easier, as you can clearly see where your lawn ends and your garden begins. Take time to check that the border is wide enough to allow for plant growth and easy access for weeding.
Prepare the Soil for Planting
Loosen the soil within the marked area using a garden fork, turning it to a depth of at least 8 inches. Remove any perennial weeds by their roots. Spread a 2-3 inch layer of compost evenly over the soil and work it in with a rake. Compost improves soil structure, aeration, and moisture retention. After amending, level the area and let it settle for a day. This preparation creates a welcoming environment for roots to establish quickly. Poorly prepared soil can lead to water pooling or hard clods that hinder growth. Checking that the soil crumbles easily is a practical sign of good quality. This step is vital because strong roots mean more flowers and better pollination.
Select and Arrange Your Plants
Visit a local native plant nursery and choose plants that are well-suited to your climate. Aim for a mix of flower shapes and colors: daisy-like flowers for small pollinators, tubular flowers for hummingbirds, and flat-topped clusters for butterflies. Arrange your plants while they are still in pots to visualize the design: taller plants (e.g., bee balm, coneflower) in the back, mid-height (e.g., coreopsis, lavender) in the middle, and low spreaders (e.g., creeping thyme) in the front. Keep plants in groups of at least three of the same species to create a 'target' for pollinators. This arrangement ensures visual impact and provides efficient foraging. Check that each plant has enough space to grow to its mature size, avoiding overcrowding.
Plant Your Border
Dig a hole for each plant twice as wide as the root ball and just as deep. Gently remove the plant from its pot, loosen any circling roots, and place it in the hole. Backfill with the soil you removed, pressing down to eliminate air pockets. Water each plant thoroughly right after planting. Space the plants according to their mature width, but a bit closer (about 75% of recommended spacing) to achieve a fuller look quicker. After planting, water the entire border deeply if rain isn't expected. This step gives your plants a strong start. Check that each plant is at the same soil level as in its pot—planting too deep can cause stem rot. Proper spacing and depth are critical for reducing transplant shock.
Water and Mulch
Immediately after planting, water the border to settle the soil. For the first two weeks, water every day or two to keep the root zone moist—not soggy. After that, gradually reduce watering to encourage deep root growth. Apply a 2-inch layer of mulch (such as shredded bark, pine straw, or compost) over the soil, keeping it away from plant stems. Mulch suppresses weeds, retains moisture, and moderates soil temperature. Check that the mulch is not piled against the stems to prevent rot. Water at the base of plants using a soaker hose or watering can, avoiding overhead watering which can promote fungal diseases. This routine is essential during the establishment period.
Maintain and Deadhead
Once your border is established (after a few weeks), switch to deep waterings about once a week, or as needed. Deadhead spent flowers by snipping them off at the stem to encourage more blooms and extend the flowering season. In late fall, leave some seed heads standing to provide food and shelter for birds and insects. Cut back perennials in early spring, and refresh the mulch annually. Monitor for weeds and pull them out as soon as you see them. This ongoing care keeps your border healthy and productive. Check for signs of stress, such as yellowing leaves, and adjust watering or soil accordingly. A pollinator border is not a 'plant and forget' garden—it thrives with your attention.
Quick Reference
| Situation | Action | Why it helps |
|---|---|---|
| You see aphids on your rose or milkweed. | Spray them off with a strong jet of water from a hose, targeting the underside of leaves. Avoid any insecticide. | Water dislodges aphids without harming beneficial insects like ladybugs and lacewings that feed on them. |
| Your border receives less than 6 hours of direct sunlight. | Choose plants labeled as 'part shade' or 'shade-tolerant', such as columbine or bleeding heart, and avoid full-sun species. | Plants suited to low light will still produce nectar and pollen for pollinators without stressing from too much sun. |
| You see few butterflies or bees visiting your border. | Add a shallow water source like a birdbath with stones, and plant a patch of flat-topped flowers like yarrow or fennel. | Pollinators need water to drink and perch, and flat-topped flowers provide easy landing platforms for butterflies and bees. |
Common Issues
- Plants are stunted and have yellowing leaves.: Check soil drainage: if water pools, dig in additional compost or consider raising the bed. Overwatering is a common cause.
- Many flowers but few pollinators visiting.: Ensure you have a variety of flower shapes and colors, and avoid overuse of double-petal varieties that lack pollen.
- Invasive weeds keep popping up.: Apply a thick layer (3-4 inches) of organic mulch annually, and pull weeds when they are small to prevent seeding.
Advanced Tips
- Install a bee hotel for solitary bees by bundling hollow stems or reeds in a wooden frame, placed in a sunny, sheltered spot.
- Plant a climbing vine like honeysuckle or clematis at the back of a fence to provide vertical interest and additional nectar.
- Create a 'pollinator corner' by leaving a small patch of bare compacted soil, which many native bee species use for nesting.
Final Checklist
- Choose a sunny site with at least 6 hours of direct sunlight and amend soil with compost.
- Plant a diverse mix of native flowers that bloom from spring to fall, in clusters of 3 to 5.
- Water deeply until plants are established, then reduce frequency; mulch to conserve moisture.
- Deadhead regularly, pull weeds, and avoid all chemical pesticides and fertilizers.
FAQ
When is the best time to plant a pollinator border?
The ideal time is in early spring or fall when temperatures are mild and plants can establish roots without heat stress. Avoid planting during the heat of summer unless you can water frequently.
How much space do I need for a pollinator border?
You can create one in a strip as narrow as 3 feet wide or in a container. The key is to have at least a few plants of the same species together. Even a small balcony can support pollinators with a few pots of flowers.
Do I need to water my pollinator border often?
After establishment, most native plants prefer infrequent, deep watering, about 1 inch per week. Overwatering can be harmful. Use your finger to check soil moisture—if it's dry an inch down, it's time to water.