A Practical Garden Tool Storage Setup Checklist For First Time Readers
A practical step-by-step guide to a practical garden-tool storage setup checklist for first-time readers, including preparation, instructions, common issues, tips, and next steps.
A Practical Garden Tool Storage Setup Checklist For First Time Readers
This guide provides a practical, step-by-step checklist for setting up an efficient and safe garden-tool storage space. It is designed for first-time readers who want to keep their tools organized, protected, and easy to find. From choosing a location to organizing small items and maintaining tools, each step is explained with simple actions and checks to ensure longevity and easy access.
Fast Answer
- Start by choosing a dry, accessible location like a shed or garage, then clean and clear the area. Group tools by type and use wall hooks, shelves, and buckets for storage, and always clean tools before storing them.
- Protect tools from moisture and rust by hanging them or placing them in a dry container with silica gel. Use a tool rack or pegboard for long-handled tools, and a magnetic strip for small metal tools.
Before You Start
- Gather basic tools and materials: a broom, a mop, a bucket, some hooks or pegboard, screws or nails, a drill or screwdriver, trash bags, and containers like buckets or bins.
- Decide on the storage area: choose a spot that is dry, well-ventilated, and easy to access, like a shed, garage, or even a covered corner of a patio. Ensure no water leaks or dampness.
- Take inventory of all your garden tools: list everything from spades and rakes to hand trowels and pruning shears. This will help you plan how much storage you need.
- Clear the area: remove any clutter, old items, or debris. Sweep the floor and wipe down any shelves or wall space to ensure a clean, dry starting point.
Step-by-Step Instructions
Choose and Prepare the Storage Spot
Pick a location that is dry, well-ventilated, and has enough space for your tools. A shed, garage, or utility room works well. If you have to store tools outside, use a weatherproof cabinet. Clean the area thoroughly: sweep the floor, wipe down shelves, and check for any signs of moisture or pests. If the floor is bare concrete, lay down pallets or wooden slats to keep tools off the damp ground. This prevents rust and rot. Check that the area has good airflow to avoid trapped humidity, which can cause metal tools to corrode. If you notice any damp spots, fix the source of water before proceeding. A clean, dry spot is the foundation of good tool storage.
Sort Tools into Groups and Categorize
Gather all your garden tools and divide them into categories: long-handled tools like shovels and rakes, hand tools like trowels and pruners, power tools if any, and supplies like gloves and watering cans. This makes it easier to plan storage. For each group, decide how often you use the tools. Frequently used tools should be stored at arm's reach, while seasonal tools can be placed higher or in the back. Make a simple list of what you have to ensure nothing is forgotten. This step is crucial because it prevents clutter and helps you quickly find what you need. A logical arrangement saves time and reduces frustration.
Install Wall-Mounted Racks and Pegboard
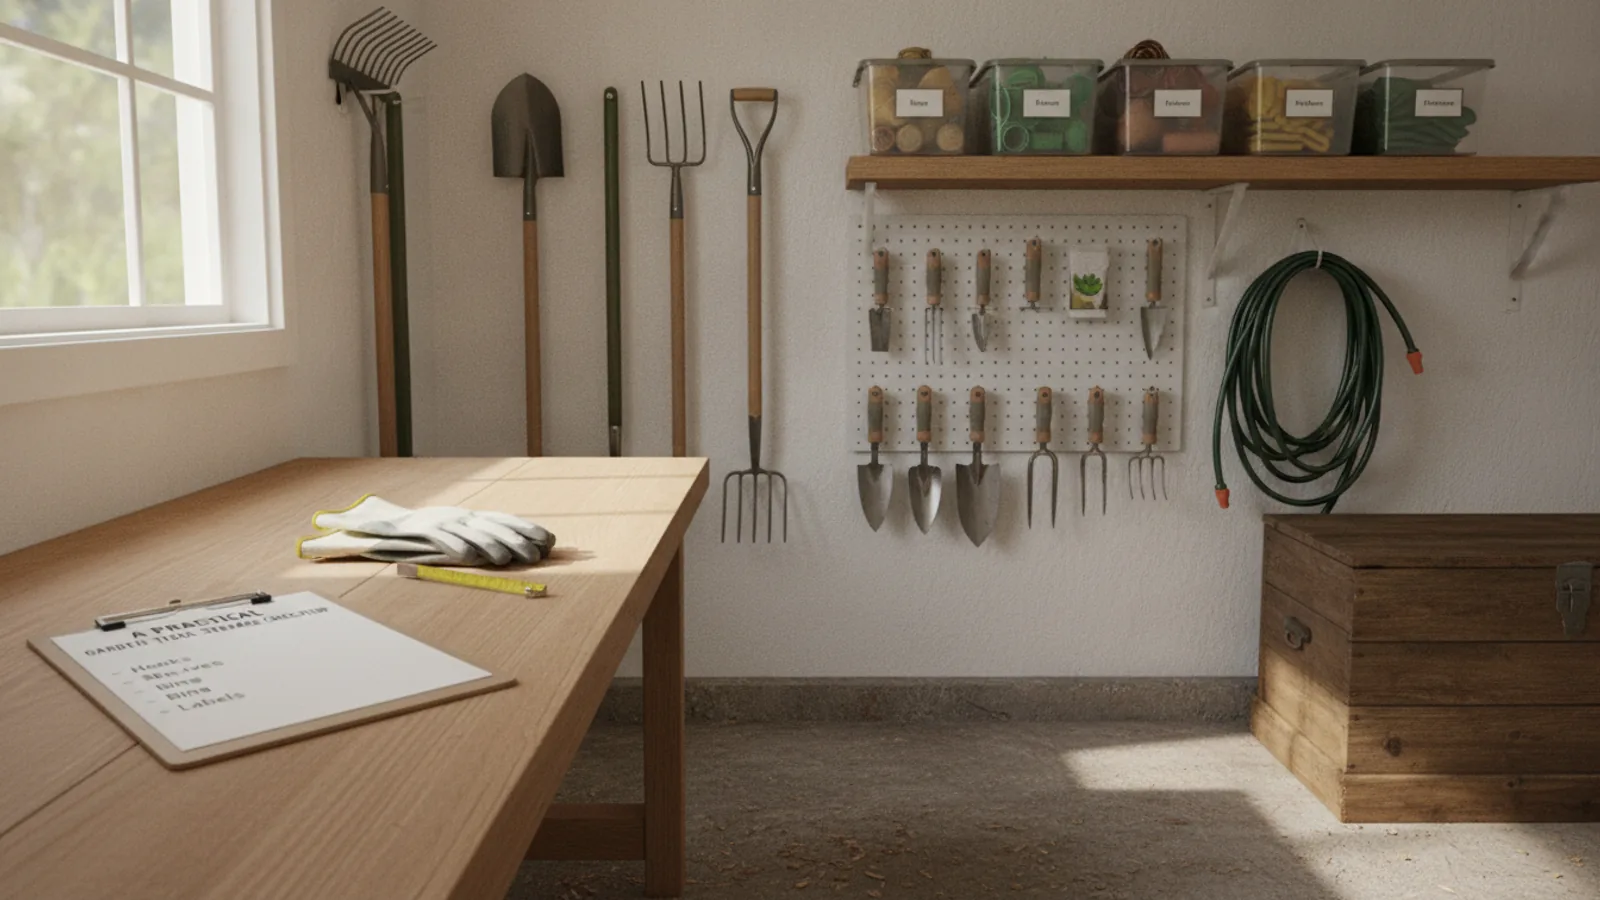
Use wall space to keep tools off the ground and visible. Install a pegboard or metal rail system for hand tools like trowels, shears, and claw hammers. For long-handled tools like rakes and shovels, use a specialized rack that holds them vertically or horizontally against the wall. Make sure the screws or anchors are secured into studs or masonry so they can bear the weight. Start by marking the positions, then drill pilot holes and attach the board or hooks. Check that tools hang securely and do not fall off. Hanging tools saves floor space and prevents accidents from tripping over them. It also allows air to circulate around the tools, reducing rust.
Organize Small Tools and Accessories
Hand tools like pruners, trowels, and weeders are easy to lose. Use a large bucket with a pocket organizer, a toolbox with compartments, or a wall-mounted container with slots. For small items like plant ties, twine, and gloves, use clear glass jars or labeled bins. Place a magnetic strip on the wall to hold metal tools like scissors and files. Keep frequently used items in an open container so you can grab them quickly. This step ensures that small tools are easily visible and accessible, preventing them from being misplaced or left outside to rust. A dedicated place for each item also makes cleanup easier after gardening.
Clean and Protect Tools Before Storing
Before putting any tool into storage, clean it thoroughly. Remove dirt and mud with a stiff brush or an old cloth. For metal parts, wipe them with a lightly oiled rag to prevent rust. Use a biodegradable oil or a general-purpose lubricant. Check wooden handles for splinters or cracks and sand them smooth if needed. If a tool is very dirty, rinse it with water and dry completely. This step is vital because moisture and dirt are the main causes of tool deterioration. A clean, dry tool lasts longer and works better. Take the time to do this each time you use a tool, and your tools will serve you for years.
Label Everything and Maintain the System
Once your tools are organized, label shelves, bins, and hooks to remind you where everything belongs. Use simple labels like 'Hand Tools', 'Pruners', and 'Gloves'. This helps everyone in the household return tools after use. Establish a routine: after each gardening session, take a few minutes to put tools back in their designated spots. Regularly, say once a month, check for any signs of rust, damage, or missing tools. Tighten any loose handles and sharpen blades as needed. This maintenance ensures your system remains effective and your tools stay in good condition. Labeling also saves time when you are looking for a specific tool.
Quick Reference
| Situation | Action | Why it helps |
|---|---|---|
| You have many long-handled tools like shovels, rakes, and hoes that tend to fall over. | Install a wall-mounted tool rack with slots specifically for long handles; place the handles in the rack and secure them with clips if the rack has them. | This keeps heavy tools upright and off the floor, preventing accidents and saving floor space while also allowing air flow to dry the handles. |
| Your small hand tools (pruners, trowels) are often lost or scattered in the garden. | Designate a large bucket or a pegboard with individual loops for each small tool; after use, wipe and return each tool to its slot. | Having a specific home for each tool makes it easy to spot missing items and prevents them from being left outdoors where they can rust or get lost. |
| You notice rust starting to form on metal blades after storing them for a while. | Remove light rust with fine steel wool, then wipe the blade with a cloth dipped in a light machine oil; store tools in a dry place with a silica gel packet nearby. | Rust spreads and weakens metal; oil acts as a barrier against moisture, and a dry environment slows down the rusting process, keeping tools functional. |
Common Issues
- Tools keep rusting even when stored indoors.: Ensure the storage area is truly dry by adding a dehumidifier or placing moisture-absorbing silica gel packs. Coat all metal surfaces with a thin layer of protective oil before long-term storage.
- Large tools constantly fall over and take up floor space.: Build or buy a vertical rack that holds handles securely. Install it on the wall so that tools are lifted off the ground and positioned handle-up, which also prevents bending of handles.
- You can never find the right tool because everything is mixed in one pile.: Sort tools by type and use clearly labeled containers or wall hooks. Aim to store each tool in the same place every time, and adopt a habit of returning tools immediately after use.
Advanced Tips
- Hang a small spray bottle filled with a rust-preventive solution near the storage area so you can quickly spritz tools before storing.
- For wooden handles, periodically rub them with linseed oil to keep them from drying out and cracking, preserving their strength and comfort.
- Create a dedicated 'seasonal tools' corner for items used only a few months a year, covering them with a breathable cloth to keep dust off while allowing air circulation.
Final Checklist
- I have chosen a dry, well-ventilated spot and cleared it of clutter and debris.
- I have sorted all tools into groups and installed wall racks or hooks for each type.
- I have set up a system for small tools using buckets, pegboards, or labeled bins.
- I have cleaned and oiled every metal tool before storing and placed them in their designated spot.
FAQ
What is the best way to store garden tools without a shed?
If you don't have a shed, you can store tools in a weatherproof deck box or a large outdoor cabinet designed for tools. Alternatively, use a wall-mounted rack on the side of your house under an overhang, and cover tools with a tarp. Always ensure tools are dry before storing to prevent rust.
How often should I clean and oil my garden tools?
It is best to clean tools after every use, especially if they have been in contact with soil or moisture. Apply a light coat of oil to metal parts at least once a month, or more often in humid weather. This quick routine will keep blades sharp and prevent rust.
Should I hang tools by their handles or by their heads?
Hanging tools by their handles (handle up) is generally recommended for long-handled tools. This prevents the head from banging against the wall, which can loosen or damage the connection. For hand tools with holes in the handle, you can hang them by the hole, but ensure they are secure and not swinging.