What To Check Before A Beginner Composting Corner That Stays Tidy
A practical step-by-step guide to what to check before a beginner composting corner that stays tidy, including preparation, instructions, common issues, tips, and next steps.
What To Check Before A Beginner Composting Corner That Stays Tidy
This guide helps beginners set up a composting corner that stays tidy and odor-free, covering location, bin choice, material layering, moisture balance, and simple upkeep routines so you can compost confidently without mess or smell.
Fast Answer
- Choose a dry, shady spot near your kitchen and use a bin with a tight lid to keep pests away and reduce odors.
- Start with a mix of brown and green materials, keep it moist like a wrung sponge, and turn it weekly to speed up decomposition.
Before You Start
- Select a bin or container with a tight-fitting lid to keep out pests and contain odors; use a small indoor bin for kitchen scraps.
- Pick a level, well-drained spot in your yard or balcony away from direct sun and rain splash, but convenient to your kitchen door.
- Gather a supply of brown materials like dry leaves, shredded paper, or cardboard, and green materials like vegetable peels and grass clippings.
- Keep a small trowel or pitchfork, a spray bottle, and a kitchen caddy with a lid for collecting daily scraps without mess.
Step-by-Step Instructions
Choose the Right Location and Bin
Place your composter on bare soil or a pallet to allow drainage and access for worms and beneficial microbes. In a balcony or patio, use a tumbler or sealed bin with a tap for liquid drainage. Keep it within a few steps of your kitchen door so it is convenient, but in a spot that gets partial shade—direct sun dries the pile too fast, while full shade keeps it soggy. Check that the spot is level, drains well, and does not sit against wood fencing that can stain. If you keep the bin on a hard surface, elevate it on bricks and add a tray to catch any liquid. This reduces mess and makes it easier to turn the pile and remove compost.
Layer Browns and Greens at the Start
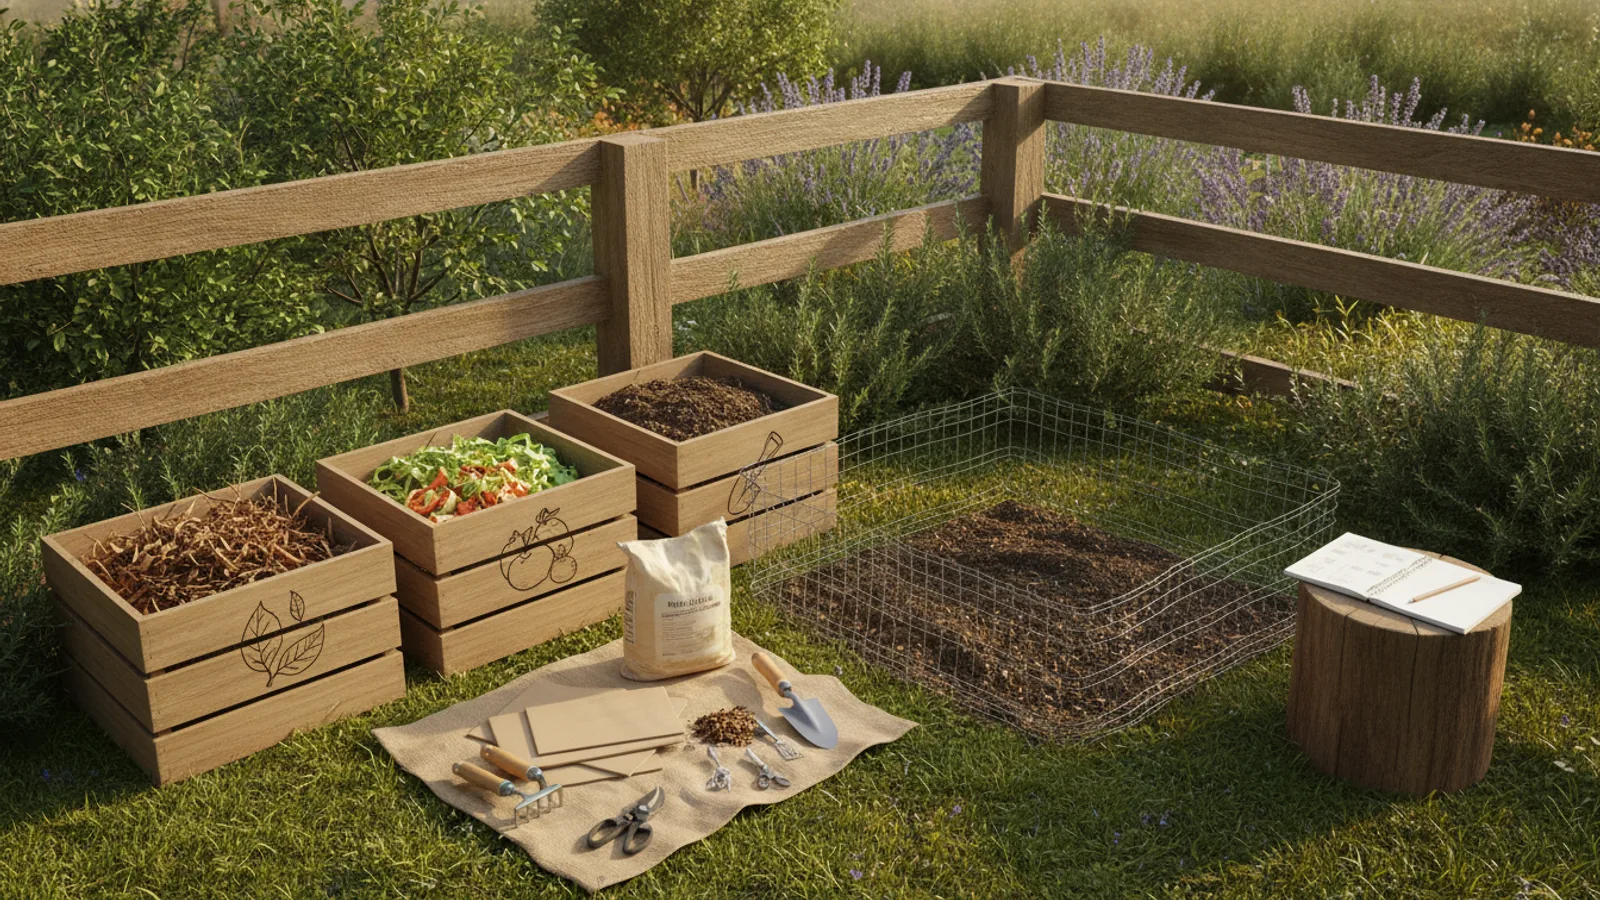
Begin by adding a 6-inch layer of coarse browns like twigs or straw at the bottom for airflow. Then add one part greens (food scraps, grass clippings) to roughly two to three parts browns (dry leaves, shredded cardboard) by volume. Alternate layers as you fill the bin, keeping each layer about 2 to 4 inches thick. After adding materials, check the texture—it should feel like a wrung-out sponge, not dripping wet or bone dry. This balance prevents foul odors and matting. Use a rake or stick to fluff the pile slightly, ensuring air can move through the layers. This initial structure sets the stage for fast, tidy decomposition.
Bury Food Scraps Immediately
Each time you add kitchen scraps, dig a small hole in the center of the pile with your trowel, drop the scraps in, and cover completely with a few handfuls of browns. This buries the food under a barrier that stops flies from landing, reduces smell, and prevents animals from being attracted. Check that no scraps are sticking out before you walk away—a quick visual scan takes two seconds and keeps your corner tidy. Burying also distributes moisture and nitrogen where microbes are active. If you have a lot of scraps at once, lift the pile slightly with a fork to mix them in rather than dumping on top. This practice keeps your bin neat and accelerates breakdown.
Keep the Balance of Moisture and Air
Check the moisture level each time you add materials by squeezing a handful—it should feel like a damp sponge with a few drops of water, never dripping. If it is too dry, spray lightly with water while turning; if too wet, add more browns and mix well to absorb excess. Air is equally important, so turn the pile once a week with a pitchfork or compost aerator, moving the outer material to the center. This fluffs the pile and supplies oxygen to the microbes. Pay attention to texture: if the pile is clumped and slimy, add browns; if it is dusty and dry, add greens or water. Consistent moisture and airflow prevent rot and odor.
Turn the Pile Every Week
Set a weekly reminder to turn the entire pile, moving materials from the edges to the center and the bottom to the top. This mixes fresh scraps with active compost, distributes moisture, and prevents anaerobic pockets that create bad smells. Use a pitchfork or trowel, and check the core temperature—it should feel warm if decomposition is active. If the pile is cold, it may be too dry or need more greens. Turning also shrinks the pile, so you will have room for more scraps. After turning, observe the texture—it should be crumbly with no large recognizable pieces. If you see clumps, break them apart. Weekly turning speeds up the process and keeps your corner neat.
Harvest Finished Compost and Restart
After 8 to 16 weeks, the pile will become dark, crumbly, and earthy-smelling with no visible food scraps. Check by taking a handful: it should break apart easily and smell like forest soil, not ammonia. Sift the compost through a simple screen or by hand, returning any large pieces to the bin. Spread the finished compost on your garden or potted plants. Then clean the bin by brushing out residue and letting it air dry before starting a new batch. This resets your system. Check that the bin is free of pests and odor before adding new layers. Harvesting gives you a tidy, ready-to-use product and keeps your corner from overflowing.
Quick Reference
| Situation | Action | Why it helps |
|---|---|---|
| Your compost smells like rotten eggs or sour milk. | Stop adding greens and mix in a generous layer of dry browns, turning the pile to fluff it and restore oxygen. | A sour smell indicates too much moisture and not enough air, so dry browns absorb liquid and rebalance the pile. |
| Flies or ants are hovering around your bin. | Uncover the pile and thoroughly bury all food scraps under a 2-inch layer of browns immediately. | Exposed food scraps attract pests, so a physical barrier of dry materials prevents them from reaching the food. |
| The pile is dry and not heating up after weeks. | Add green materials like grass clippings or vegetable peels and water lightly while turning to moisten the whole pile. | Microbes need both nitrogen-rich greens and moisture to become active, so rehydrating and feeding starts decomposition. |
Common Issues
- Pile is too wet and slimy: Add dry browns like cardboard, leaves, or straw and turn thoroughly to absorb excess moisture; if it persists, uncover the pile in dry weather.
- Compost attracting rodents or cockroaches: Stop adding any cooked food, meat, or dairy; secure the lid and bury all scraps under browns; consider a vermin-proof bin.
- Decomposition is slow, with no heat: Check moisture and add more green materials, then turn the pile well to introduce oxygen; chop larger pieces to increase surface area.
Advanced Tips
- Keep a bungee cord or weight on the lid to deter raccoons and dogs from knocking it open.
- Try the two-bin method: let one bin finish while filling the other, so you always have a place for scraps.
- Chop larger materials like branches or cabbage stalks with pruning shears to speed up breakdown and make turning easier.
Final Checklist
- Choose a dry, moderately shaded spot with the bin on soil or a tray.
- Stock browns and greens in separate containers near the bin.
- Bury every addition of food scraps under at least a few inches of browns.
- Turn the pile weekly and monitor moisture so it stays like a wrung sponge.
FAQ
How often should I turn my compost pile?
Turn it once a week to mix materials, add oxygen, and speed up decomposition. If you forget, turn it every two weeks at minimum. A regular schedule, like every Sunday, makes it easier to remember and keeps the pile active.
Can I compost citrus peels and onions?
Yes, but in small amounts. Citrus peels are slightly acidic and can deter worms, so chop them finely and mix them well. Onions and garlic peel can also be composted, but bury them deep in the pile to avoid strong odors.
What do I do if my compost smells bad?
Add dry browns like leaves, straw, or shredded paper and turn the pile immediately. The smell often means too much moisture or not enough air. Keep the ratio of greens to browns balanced, and always cover food scraps.