How To Choose A Beginner Composting Corner That Stays Tidy
A practical step-by-step guide to how to choose a beginner composting corner that stays tidy, including preparation, instructions, common issues, tips, and next steps.
How To Choose A Beginner Composting Corner That Stays Tidy
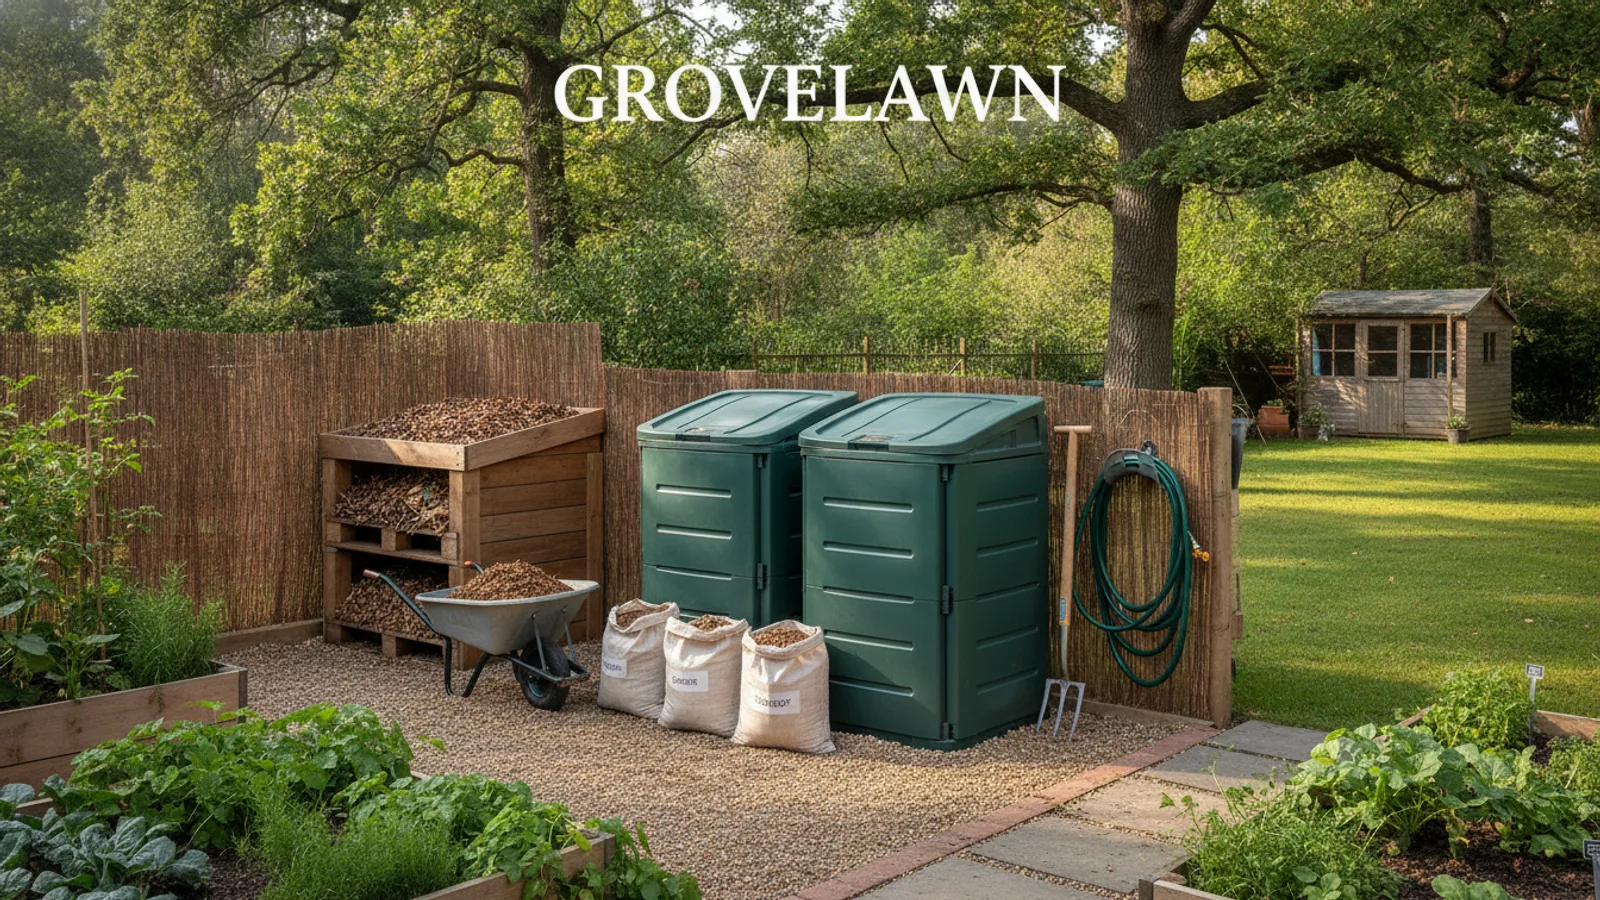
Choosing a beginner composting corner that stays tidy means picking a small, contained spot that handles kitchen scraps without looking messy or attracting pests. This guide helps you select a convenient, low-odor location, set up simple containment, and maintain balance so your compost stays neat and useful even with minimal experience.
Fast Answer
- Choose a dry, shaded spot within a few steps of your kitchen, and place a lidded bin or enclosed pile there to control moisture and smell.
- Keep your compost corner tidy by alternating green and brown materials, covering new scraps with a layer of browns, and stirring weekly to speed decomposition and reduce odor.
Before You Start
- Pick a location that is level, drains well, and gets partial shade so the pile doesn't dry out quickly or become waterlogged.
- Gather or buy a bin with a secure lid, or plan to build a simple three-sided enclosure from wood or wire mesh to keep the pile contained.
- Stockpile 'browns' like dry leaves, shredded paper, or cardboard in a separate bag or bin to cover food scraps and avoid smells.
- Keep a small countertop container with a lid for collecting kitchen scraps for a day or two before you take them outside.
Step-by-Step Instructions
Select a Convenient, Level Spot with Some Shade
Start by choosing a location near your kitchen but not in full sun. A level, well-drained area that gets a few hours of shade prevents the pile from drying out too quickly and reduces the need for extra watering. Stand in your proposed spot and imagine carrying a bucket of scraps there every day—if it feels like a hassle, move closer to the house. Check that the ground is firm and not a low spot where water pools after rain. A muddy base makes the pile soggy and messy. This specific check matters because a convenient, level location makes it easier to maintain the habit, while good drainage keeps the pile from turning into a stinking swamp.
Choose a Tidy Containment System
Select a bin with a tight-fitting lid, a tumbler, or build a simple three-sided bin from wood pallets or wire mesh. The key is to keep the compost contained so it doesn't spill over the yard. If you use an open pile, surround it with wire mesh or a wood frame. For beginners, a lidded bin is easiest because it keeps animals out and hides the contents. Place your bin on bare soil or a wire mesh base to let worms and beneficial organisms in, but if you want a completely tidy look, use a solid-bottom bin and turn it regularly. The check: ensure the lid fits snugly and that there are no gaps larger than a quarter inch. This is important because a secure container prevents odor, deters pests, and keeps the compost area looking neat.
Prepare a Brown Material Stockpile Nearby
Set up a separate bin, trash can, or a heavy-duty plastic bag next to your compost corner to store dry, brown materials like dead leaves, straw, shredded newspaper, or cardboard. Keep this stockpile covered so it stays dry, because wet browns mat down and become smelly. Every time you add kitchen scraps, you will follow with a handful of browns. To make this easy, keep a small container or scoop with your brown pile. The check: after a week, see if your brown pile is still dry and crumbly. If it's soggy, move it under a tarp or into a lidded bin. This is important because browns are the key to balancing moisture and preventing odors—they also provide the carbon that feeds the decomposing microbes.
Create a Simple Kitchen Scrap Routine
Keep a small countertop compost pail with a lid right next to your cutting board. Line it with a paper towel or a small compostable bag to keep it clean. Empty it every day or two, taking it to the corner as part of an existing habit, like after dinner. As you add scraps, immediately cover them with a layer of browns—about twice the volume of the greens. The check: after three days, note if your pail smells. If it does, empty it more often and add a bit of baking soda to the bottom. This matters because fresh compost with cool, covered scraps discourages fruit flies and keeps the mess from building up in your home.
Turn the Pile Weekly for Aeration
Once a week, use a garden fork or a compost aerator to stir the pile, moving the outer material into the center and the center out. If you have a tumbler, give it a few spins every two to three days. This introduces oxygen, which is essential for aerobic decomposition that happens without bad smells. Avoid turning if the pile is too dry—it should feel like a wrung-out sponge. If it's dry, sprinkle water while turning. The check: after turning, the internal temperature should feel slightly warm within a day, indicating active decomposition. This is important because regular turning prevents compaction and keeps the pile from going anaerobic, which produces a foul odor and slows the process.
Monitor Moisture and Adjust Materials
Squeeze a handful of compost from the center. It should feel like a damp sponge—moist enough to clump but not dripping water. If it's too dry, water it slowly as you turn. If it's too wet, add more browns and turn more often. Also watch for odors: a sour smell means too wet, and an ammonia smell means too many greens. Add browns and turn. The check: write down the date on a small sign and note how many days it takes for about half the original volume to shrink. That tells you your decomposition rate. This matters because maintaining the right moisture level is the single most important factor in keeping the compost tidy—too wet leads to slime and smell, too dry stops the process.
Quick Reference
| Situation | Action | Why it helps |
|---|---|---|
| Compost bin smells like rotten eggs or sour, and the pile looks slimy and wet. | Put on gloves, add a generous layer of shredded cardboard or dry leaves, and turn the pile with a fork to let in air. | This action restores the aerobic environment and prevents the smelly anaerobic decay from continuing. |
| Fruit flies are hovering around the kitchen scrap pail and the corner bin. | Dig a trench in the center of the pile, dump the scraps there, and cover completely with a six-inch layer of browns. | A thick brown cover also reduces odor, which is what attracts flies in the first place. |
| Compost pile is dry and crumbly, not heating up, and scraps are not breaking down. | Water the pile evenly while turning, then add a handful of grass clippings or vegetable scraps, and mix thoroughly. | Turning after watering ensures the moisture and nutrients reach the center where the action happens. |
Common Issues
- Compost attracts rodents or digging animals because the pile is open or exposed.: Enclose your compost with a wire mesh barrier and always cover new additions with browns. Remove any meat, dairy, or cooked food. Check the area for holes and rebuild the enclosure if needed.
- Pile has a strong ammonia or vinegar smell due to too many green materials.: Add more carbon-rich browns like dry leaves, shredded paper, or cardboard, and turn thoroughly to incorporate air. Reduce the amount of fresh grass clippings and food scraps for a while.
- Compost takes a long time to break down, sometimes a year or more.: Chop materials into small pieces, balance greens and browns (aim for roughly equal volumes), keep the pile moist, and turn it weekly. If it's still slow, add a handful of finished compost or garden soil to introduce more microbes.
Advanced Tips
- Create a compost 'tea' by steeping a cloth bag of finished compost in a bucket of water for a day, then use the strained liquid to feed your plants—this boosts garden growth and recycles nutrients.
- In colder months, insulate your bin with a thick layer of straw or zip-up compost bags made from polypropylene, and continue turning to keep the microbes active even in snow.
- Use a compost thermometer to chart temperature changes; if the pile drops below 120°F, turn it and add greens to reignite the decomposition, which also kills weed seeds and pathogens.
Final Checklist
- Choose a level, partially shaded spot with good drainage near your kitchen.
- Set up a closed bin or a framed enclosure with proper ventilation.
- Keep a dry bin of browns and a lidded kitchen pail for scraps.
- Turn the pile weekly and squeeze-test moisture to keep it like a damp sponge.
FAQ
Can I compost in winter if I have a small corner?
Yes, you can compost in winter. Keep a lidded bin and continue adding scraps, layering with browns. The pile may freeze, but it will resume when thawed. To speed things up, use a bin with insulation or keep it in a corner that gets some sun. Turn the pile when possible and add extra browns to balance moisture.
What should I do if my compost attracts fruit flies?
Fruit flies are usually drawn to exposed food scraps. Bury all food waste under a thick layer of browns, and make sure your kitchen scrap pail has a tight lid. Empty it every day. You can also set a bowl of vinegar with a drop of dish soap near the pile to trap flies, but the real fix is to cover your scraps properly.
How long does it take to get finished compost?
With a balanced mix of greens and browns, proper moisture, and weekly turning, you can get finished compost in as little as one to three months in warm weather. In cooler seasons, it may take longer. The pile will shrink and turn dark, crumbly, and earthy-smelling when it's ready. Look for that as your sign.