How To Choose A Practical Garden Tool Storage Setup
A practical step-by-step guide to how to choose a practical garden-tool storage setup, including preparation, instructions, common issues, tips, and next steps.
How To Choose A Practical Garden Tool Storage Setup
Choosing a practical garden-tool storage setup involves assessing your space, tool inventory, and usage habits. A good system protects tools from rust and damage, keeps them accessible, and fits your budget and available area. This guide walks you through evaluating needs, selecting storage types, organizing efficiently, and maintaining the setup, with practical checks at each step to ensure durability and ease of use.
Fast Answer
- Assess the tools you own and how often you use them, then choose a storage method that matches your available space, such as a shed, wall rack, or cabinet.
- Prioritize protection from moisture and easy access, so store tools off the ground, clean and dry them before storing, and group them by type or frequency of use.
Before You Start
- Inventory every garden tool, including handles, blades, cords, and accessories, and note their sizes and weights to determine storage dimensions and weight capacity.
- Measure the available area—whether a garage wall, shed floor, or closet—considering clearance for tool handles and walking space.
- Decide on a budget range for the storage investment, balancing between DIY options and ready-made units, but avoid stating exact prices.
- Gather basic tools for installation, such as a drill, level, stud finder, and measuring tape, and ensure you have appropriate wall anchors for your wall type.
Step-by-Step Instructions
Sort and categorize your tools
Start by gathering every garden tool you own, including trowels, pruners, shovels, rakes, hoes, loppers, and any power tools. Lay them out on a flat surface and group them into categories: hand tools, long-handled tools, power tools, and miscellaneous items like gloves, seeds, and pots. This gives you a clear picture of what needs storage. For each tool, note its handle length, weight, and whether it has a hanging hole or loop. Also inspect for rust, dirt, or damage, and clean or repair before storing. This step is crucial because it determines the type and size of storage you need. A practical check is to measure the longest handle and the heaviest tool, as these will dictate rack spacing and weight limits. By sorting first, you avoid buying storage that is too small or too weak, saving time and money. This organizational effort ensures that later steps are based on real needs, not guesses.
Choose a storage location
Evaluate the spaces available for tool storage, such as a garage wall, a shed, a basement, or a closet. Consider accessibility, protection from weather, and proximity to your garden. The ideal spot keeps tools dry, away from extreme temperature swings, and secure from theft. For wall-mounted options, you need a clear wall area with studs or strong anchoring points. If you prefer floor-standing units, measure the floor space and ensure a level surface. Also think about lighting and convenience—you don't want to wrestle with a lawn mower in a dark corner. A practical check is to take detailed measurements of the chosen area, including height, width, and depth, and to check for obstructions like pipes or electrical outlets. This step matters because the location dictates which storage type fits and how easily you can access tools. A good location prevents rust, reduces clutter, and ensures tools are ready when you need them.
Select the right storage system
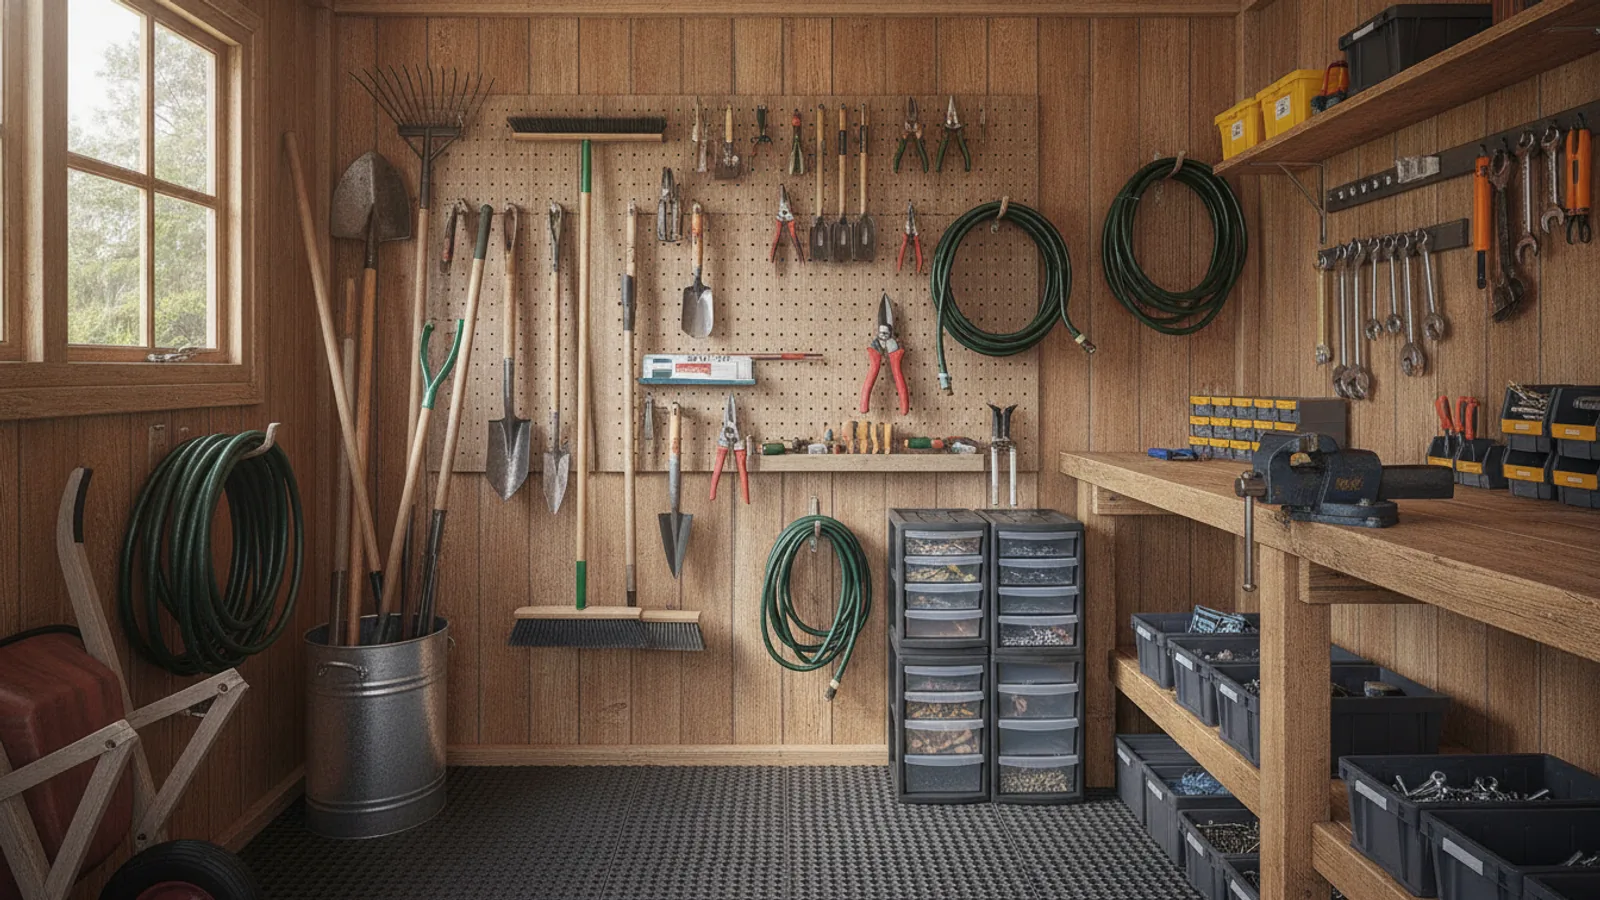
Now that you know your tools and space, decide on a storage system. Options include freestanding cabinets, wall-mounted racks, pegboards, tool sheds, or DIY pallet racks. For long-handled tools, a vertical rack with clips or slots works well; for hand tools, a pegboard with hooks or a drawer organizer keeps them visible. Consider weight capacity—wall racks should support the heaviest tool, and freestanding shelves should be sturdy. Also think about future additions: allow extra space for new tools. If you have a large collection, a combination of systems may be best. For example, a wall rack for long tools and a small cabinet for hand tools. When choosing, read reviews or test the sturdiness in person if possible. Ensure the system matches your mounting skills and wall type. A practical check is to confirm the storage unit’s weight rating and that it comes with proper hardware. This step is important because the right system ensures safety and longevity of your tools.
Prepare the installation area
Before installing your chosen storage, clear the area and make necessary repairs. Clean the wall or floor, and patch any holes or cracks. If mounting, use a stud finder to locate studs and mark their positions with a pencil. For hollow walls, you’ll need anchors rated for the weight you plan to hang. Lay out the storage components and read the instructions to ensure you have all parts. Measure and mark the exact placement, using a level to ensure straightness. For freestanding units, assemble them according to the manual and check that they are stable and level. If you’re building a custom solution, gather lumber or metal brackets and cut them to size. A practical check is to test the wall’s strength by pushing on it or using a screwdriver to probe. This preparation prevents installation errors and ensures the storage is secure. Doing this correctly avoids accidents and damage to tools, and makes the final setup look professional.
Install the storage system
Follow the manufacturer’s instructions to mount or assemble your storage system. If mounting on walls, use a drill to create pilot holes at the marked stud locations, then secure the rack or cabinet with appropriate screws. Tighten all bolts and screws firmly but avoid over-tightening which can strip threads. For freestanding units, place them in the desired spot and adjust feet to level if available. Once installed, test the sturdiness by gently pulling and pushing the unit. Do not place tools on it yet. Check that all moving parts, like doors or hooks, operate smoothly. If you have a pegboard, install the hooks according to your tool layout plan. For racks with slots, ensure the spacing allows for tool handles to hang without crowding. A practical check is to hang a heavier tool on the rack and see if it stays secure. This step matters because proper installation ensures safety and functionality, preventing collapses and making tools easily accessible.
Organize and maintain your storage
Now arrange your tools in a logical order. Place frequently used tools at eye level or within easy reach, and store heavy tools at lower heights to avoid lifting risks. Group similar tools together, and use labels for bins or shelves if needed. For long-handled tools, insert them handle-down into a bucket or rack, but ensure sharp edges are protected. For power tools, remove batteries and store them separately, and coil cords loosely. After organizing, step back and assess accessibility—can you grab a tool without moving others? Implement a routine to clean and dry tools after each use, and occasionally oil metal parts to prevent rust. Check the storage monthly for wear, loose screws, or moisture. A practical check is to schedule a monthly 10-minute tidy-up where you wipe down tools and tighten any loose hooks. This maintains the effectiveness of your setup and prolongs tool life, saving money and reducing frustration.
Quick Reference
| Situation | Action | Why it helps |
|---|---|---|
| You have many long-handled tools and limited floor space. | Install a wall-mounted vertical rack with individual slots or clips, securing it to wall studs, and place it at a height that allows handles to hang freely. | This uses vertical space efficiently, keeps tools off the ground to prevent tripping and damage, and makes each tool easy to grab without digging through a pile. |
| You notice rust forming on your metal tools despite storing them. | Set up a routine: after each use, wipe tools clean, dry completely, and apply a light coat of oil (like mineral oil) to metal parts, then store in a dry area with silica gel packs. | Rust develops from moisture and oxygen; drying and oiling creates a barrier that prevents oxidation, extending the life of your tools and keeping them safe to use. |
| You need to store small hand tools like trowels and pruners and want quick access. | Install a pegboard with hooks and small shelves or bins above your workbench, placing frequently used tools at eye level and grouping by function, such as planting vs. pruning. | A pegboard keeps small tools visible and organized, reducing time spent searching, and encourages you to return tools to their designated spots. |
Common Issues
- Tools are stored in a damp shed, leading to rust and wooden handle rot.: Move storage to a drier location, or install moisture barriers and a dehumidifier. Ensure tools are clean and dry before storing, and apply a protective oil to metal parts. Consider using rust-inhibiting sprays or wraps.
- Wall-mounted racks are loose and wobbly, posing a safety hazard.: Remove the rack, locate wall studs with a stud finder, and remount using longer or stronger screws. For drywall without studs, use heavy-duty toggle bolts or molly bolts rated for the weight. Recheck stability before loading tools.
- Tools are constantly misplaced because there is no designated spot for each.: Create a labeling system for each tool category and use shadows or outlines on pegboards to show where each tool belongs. After each use, commit to returning tools to their labeled location, and do a weekly tidy-up to reset the system.
Advanced Tips
- For long-term storage of tools used seasonally, clean and apply a rust-preventive wax (like car wax) to metal surfaces and store in a sealed container with moisture absorbers.
- Implement a modular storage system with adjustable shelves and hooks so you can reconfigure as your tool collection changes without needing new fixtures.
- If you store power tools, remove batteries and store them separately in a cool, dry place, and wrap cords around built-in cord wraps to prevent tangling.
Final Checklist
- Inventory all your garden tools and note their sizes and weights for planning storage capacity.
- Select a storage location that is dry, accessible, and secure, and measure the space accurately.
- Choose a storage system that fits your tools, space, and weight requirements, and verify its durability.
- Install the system properly with secure mounting, test stability, and organize tools in a labeled, logical manner.
FAQ
How should I store garden tools with wooden handles to prevent rot?
Keep the handles dry by storing tools in a well-ventilated area, preferably off the ground. After use, wipe the handles with a dry cloth and allow them to air-dry completely. Apply a coat of linseed oil or a wood preservative periodically to maintain the wood and prevent cracking. Avoid leaving tools in damp soil or rain.
What is the best way to organize small hand tools?
A pegboard with hooks or a drawer organizer with dividers works well for small tools like trowels, pruners, and weeders. Sort them by type or frequency of use, and place at eye level for easy access. Use labels or outlines to remind you where each tool belongs, which encourages returning them after use.
Can I store garden tools outside under a tarp?
Storing tools outside, even under a tarp, is not ideal because they will be exposed to moisture and temperature changes, leading to rust and handle deterioration. If you must store them outside, use a waterproof, ventilated shed or a locked storage chest. Make sure tools are clean and dry before storing, and periodically check for signs of rust.