How To Plan A Pollinator Friendly Border For A Compact Garden
A practical step-by-step guide to how to plan a pollinator-friendly border for a compact garden, including preparation, instructions, common issues, tips, and next steps.
How To Plan A Pollinator Friendly Border For A Compact Garden
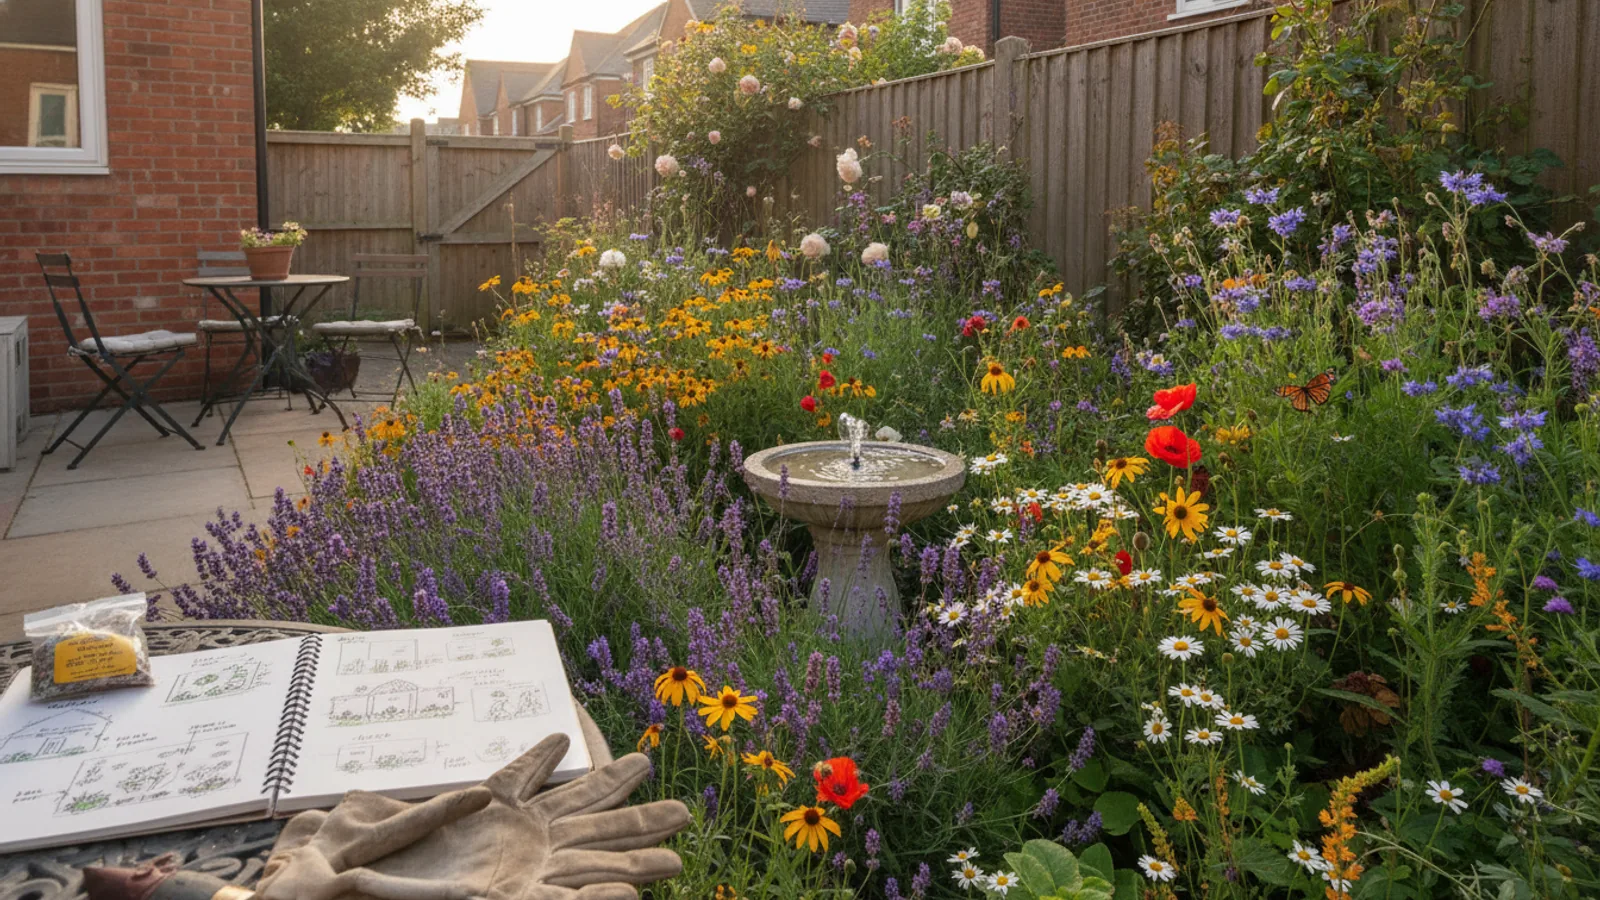
Planning a pollinator-friendly border for a compact garden means choosing a mix of nectar- and pollen-rich flowers that bloom from early spring to late autumn, providing food and shelter for bees, butterflies, and other beneficial insects. You don't need a huge space—even a narrow strip along a fence or path can become a vibrant habitat. Good planning involves assessing your sunlight, soil, and existing plants; selecting native and non-invasive flowers; arranging them for continuous bloom; and adding features like water and nesting spots. With thoughtful design, you'll create a beautiful, low-maintenance border that supports local wildlife and adds color to your garden throughout the growing season.
Fast Answer
- Start by observing your garden's sunlight and soil, then choose a variety of native, nectar-rich plants that bloom at different times from spring to fall.
- Arrange plants in clusters of at least three of the same species, add a shallow water source, and avoid pesticides to create a welcoming habitat for pollinators.
Before You Start
- Observe your border area over a full day to note how many hours of direct sunlight it receives. Most pollinator-friendly flowers need at least six hours, but partial shade works for some, so match plants to your light conditions.
- Test your soil drainage by digging a small hole and filling it with water; if it drains within an hour, you have well-drained soil. This helps you choose plants that will thrive and avoid root rot.
- List the plants you already have in the border and note their bloom times. This prevents gaps in the season and helps you select new plants that fill food shortages for pollinators.
- Sketch a simple plan of your border, marking where you'll place new plants. Group them in odd-numbered clusters (like 3 or 5) of each species to make it easier for pollinators to find and forage efficiently.
Step-by-Step Instructions
Assess Your Space and Conditions
First, take a close look at the border you want to transform. Measure its length and depth, and note any obstacles like a fence, wall, or tree that might cast shade. Check the soil type by feeling it: sandy soil feels gritty and drains fast, while clay feels sticky and retains water. Also, observe how water behaves after rain—if puddles linger, you'll need plants that tolerate moist soil. This step is crucial because choosing plants that match your light and soil conditions will ensure they establish well and bloom reliably, providing a steady food source for pollinators. Walk around at different times of day to see exactly how sunlight patterns change, and dig a small hole to check for roots from nearby trees that might compete with your new plants. Make notes so you can refer back when selecting species.
Choose a Diversity of Flowering Plants
Now select a mix of flowers that bloom from early spring to late fall, ensuring a continuous supply of nectar and pollen. Include at least three native species, as they often support local pollinators best. For spring, consider crocus, primrose, or bleeding heart. Summer options include coneflower, bee balm, and lavender, while autumn favorites are asters and sedum. Aim for a variety of flower shapes: daisy-like forms attract many bees, tubular flowers suit hummingbirds and butterflies, and clustered small flowers are perfect for tiny native bees. Choose plants with different mature heights to create a layered border—taller ones in back, shorter in front. When you buy plants, check the nursery tag for bloom time, height, and sun requirements, and avoid any treated with systemic pesticides.
Plan Your Layout in Clusters
Arrange your chosen plants in drifts or clusters of at least three to five of the same species, rather than planting single specimens scattered about. This makes it easier for pollinators to spot a good food source and reduces their energy costs when foraging. In your sketch, group taller plants at the back or center of an island bed, with medium and low growers toward the edges. Consider bloom succession: place early bloomers behind late bloomers so that when the early ones fade, the later ones fill in, keeping the border attractive. Leave a few bare patches of soil for ground-nesting bees, and avoid mulching too thickly. Use a garden hose or string to outline each cluster on the ground before planting, so you can adjust spacing easily.
Prepare the Soil Before Planting
Once your plan is set, prepare the soil to give your plants the best start. Remove existing weeds, especially perennial roots, by digging them out or using a hoe. Loosen the soil to a depth of about 12 inches using a garden fork or tiller, then mix in a 2- to 3-inch layer of compost or well-rotted manure to improve drainage and fertility. Avoid synthetic fertilizers, as they can promote soft growth that attracts pests and reduce the nectar quality. Rake the area smooth and water it lightly a day before planting. This preparation is vital because healthy soil leads to strong root growth, which helps plants withstand drought and disease, ensuring they bloom vigorously for pollinators. If your soil is very poor, consider building a raised bed filled with quality topsoil and compost.
Plant with Care and Water Well
Plant your chosen species at the appropriate depth, usually the same as the pot they came in, and space them according to their mature size to avoid overcrowding. Dig a hole twice as wide as the root ball, place the plant, and backfill with soil, firming gently. Water each plant thoroughly after planting to settle the soil and eliminate air pockets. Then water regularly for the first few weeks until new growth appears, as established plants need less water. Mulch around the base of each plant with a 2-inch layer of organic mulch, but keep it a few inches away from stems to prevent rot. This careful planting reduces transplant shock and helps plants establish quickly, creating a resilient border that will thrive with minimal fuss later.
Add Habitats and Provide Ongoing Care
To truly support pollinators, go beyond flowers. Add a shallow water source like a saucer with stones for bees to land on, and keep it filled. Leave some areas of bare, sandy soil for ground-nesting bees, and consider putting up a small bee house for solitary bee species. Avoid disturbing these nesting spots during the season. Maintain your border by deadheading spent flowers to encourage more blooms, but leave some seed heads for birds in autumn. Cut back perennials only in early spring, as hollow stems and dry foliage provide homes for overwintering insects. In spring, apply a thin layer of compost, but don't overdo it. Regular weeding and monitoring for pests by hand will keep the border healthy without chemicals.
Quick Reference
| Situation | Action | Why it helps |
|---|---|---|
| You notice bees are not visiting your border as much as you'd like. | Increase the number of flowering plants and add more species with different flower shapes and colors, especially purple, yellow, and blue, and ensure there are at least three bloom times. | Pollinators have different preferences and forage over distance; a greater variety of shapes and colors attracts a wider range of species and encourages longer stays. |
| Your border receives only partial shade (less than 6 hours of sun). | Choose shade-tolerant natives like columbine, bleeding heart, and hostas (if not too ornamental), and place them where they get morning sun to aid flower production. | Morning sun dries dew and warms blooms, making them more attractive to pollinators, while shade-loving plants thrive without the stress of full sun. |
| Weeds are competing with your young plants for water and nutrients. | Hand-pull weeds regularly, especially after rain when soil is moist, and apply a thick layer of organic mulch around the plants to suppress new weed growth. | Mulch blocks light to weed seeds and retains soil moisture, reducing the need for frequent watering and manual weeding, which protects your plants' growth. |
Common Issues
- Leaves are being eaten by insects, creating holes.: Inspect the plants for caterpillars or beetles and remove them by hand early in the morning. For severe infestations, spray a mild soap solution (not detergent) on affected areas, but only after dusk to avoid harming pollinators that may be present.
- Plants become leggy and flop over, especially in windy spots.: Stake tall perennials early in the season using bamboo canes or grow-through supports. Place supports before plants reach full height to avoid damaging roots, and allow natural growth to hide them.
- Flowers begin to look scorched or wilted during hot, dry spells.: Water deeply and infrequently (about 1 inch per week) rather than frequent shallow watering. Add a layer of mulch to retain soil moisture and consider installing a drip irrigation system or a rain barrel to make watering easier.
Advanced Tips
- Create a 'pollinator buffet' by growing a patch of herbs like thyme, oregano, and chives, which thrive in compact spaces and produce masses of small flowers loved by bees.
- Include a few annual climbers like climbing nasturtium or scarlet runner bean on a trellis at the back of the border to add vertical interest and extend the bloom season without taking up more ground.
- Plant a variety of native grasses among your flowers to provide shelter and nesting material for butterflies and other insects, while also adding texture and movement.
Final Checklist
- I have observed sunlight and soil conditions and chosen plants that match those conditions.
- I have selected a mix of spring, summer, and fall bloomers, including native species with diverse flower shapes.
- I have arranged plants in clusters of three or more and planned for continuous bloom succession.
- I have installed a water source and left some bare soil or nesting material for pollinators, and I will avoid all pesticides.
FAQ
How much space do I need for a pollinator-friendly border?
Even a border as narrow as 2 feet along a path or wall can work. The key is to pack in a variety of plants and ensure good succession. You can also grow some plants vertically using obelisks or trellises. A small space with many blooms is better than a large area with sparse flowers.
What are the best flowers for pollinators in a small garden?
Native wildflowers like black-eyed Susan, purple coneflower, and bee balm are excellent. For smaller areas, consider compact cultivars like 'Butterfly Blue' scabiosa, lavender, and salvia. Herbs like thyme and oregano are also superb. Always check that the species are non-invasive in your region.
Do I need to keep the soil bare for ground-nesting bees?
Many native bees nest in bare, sandy soil, so it's helpful to leave a small patch of undisturbed soil (about a foot square) free from mulch, plants, or stepping stones. Avoid cultivating that area after spring, as you might disturb their nests. You can also make a bee bank by piling sand in a sunny, sheltered spot.