What To Check Before A Small Patio Planting Plan For Long Summer Colour
A practical step-by-step guide to what to check before a small patio planting plan for long summer colour, including preparation, instructions, common issues, tips, and next steps.
What To Check Before A Small Patio Planting Plan For Long Summer Colour
This guide helps you prepare a small patio for long-lasting summer colour by checking sunlight, soil, drainage, plant compatibility, pot sizes, and watering needs before planting. Following these checks ensures your patio plants thrive from early summer into autumn with minimal fuss.
Fast Answer
- Before planting, measure how many hours of direct sun your patio gets each day and choose plants that match that light level, as most flowering plants need 6 hours or more to bloom well.
- Check your pots have drainage holes and use a lightweight potting mix that holds moisture but drains quickly, because waterlogged roots are the top cause of patio plant failure.
Before You Start
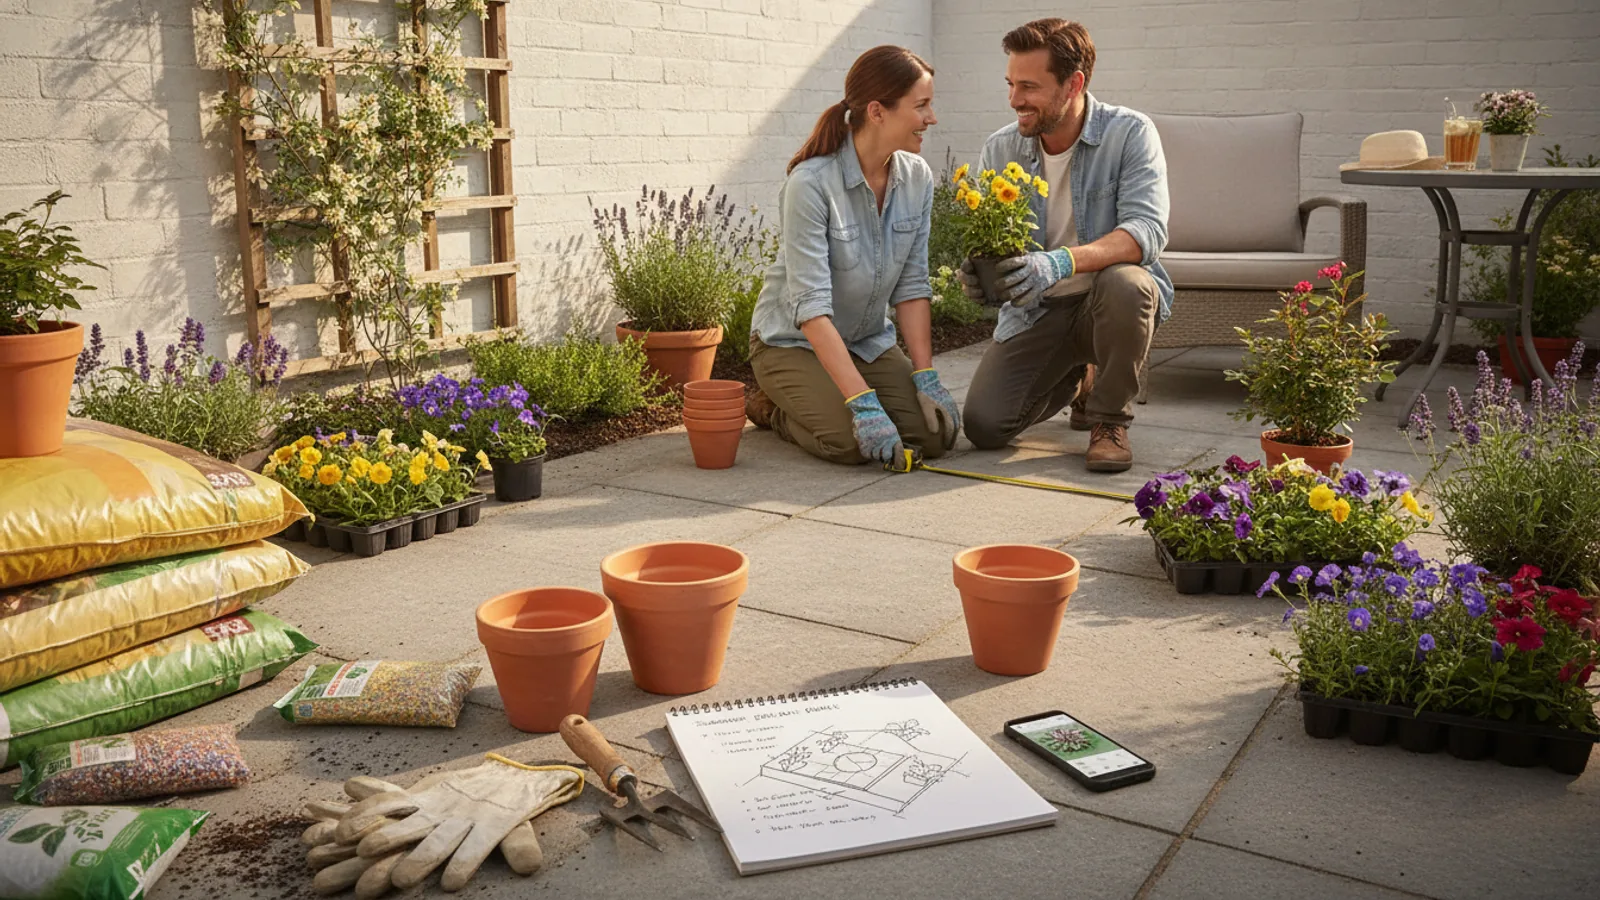
- Watch your patio at different times of the day for a few days to estimate total sunlight hours, noting any shade from walls, fences, or trees that will affect plant growth.
- Test soil moisture by sticking your finger a few inches into the pot; if it feels soggy or very dry, adjust watering habits before planting to establish a consistent routine.
- Measure each pot's diameter and depth to ensure it can comfortably accommodate the mature size of the plants you choose, avoiding overcrowding that stresses roots.
- Gather essential tools like a trowel, gloves, slow-release fertilizer, and a watering can with a fine rose so you can complete the planting smoothly and care for the plants afterward.
Step-by-Step Instructions
Check Your Patio's Sunlight Exposure
Start by observing your patio during a typical sunny day. From early morning to early evening, note every hour when the sun directly hits the ground. Most flowering annuals and perennials that bloom all summer need at least 6 hours of direct sunlight to produce abundant flowers. If your patio only gets morning sun and afternoon shade, you will need to choose shade-tolerant plants like begonias or fuchsias instead of sun lovers like petunias. Pay attention to any nearby trees, fences, or building walls that cast shadows at different times, because the light pattern can change with the season. For a patio, you can also use containers on wheels to move them slightly to catch more sun, but that is an extra effort. The key is to match the plants to the actual light you have, not what you wish for. This single check saves you from weak, leggy plants that refuse to flower later.
Test the Drainage of Every Pot
Before adding any soil, pick up each empty container and inspect the bottom for drainage holes. A pot without holes will hold water at the root zone, causing root rot and drowning your plants. If your pot lacks holes, either drill one or two half-inch holes in the base, or use it as a decorative outer pot and plant inside a separate, holed pot that sits inside. For pots with holes, put a piece of mesh, a coffee filter, or a broken terracotta shard over the hole to keep soil from washing out while water flows freely. Then fill the pot with water and watch how quickly it exits. It should drain within a few seconds, not pool on top. If drainage is slow, consider adding a layer of coarse gravel or perlite at the bottom, but be aware that too many fine particles can still clog. Good drainage is non-negotiable because most patio plants, even those that like moisture, cannot survive in waterlogged conditions. This quick test prevents the most common cause of container plant death.
Select the Right Potting Mix and Plant Types
Use a balanced, peat-free container potting mix designed for patio containers, not garden soil or cheap topsoil. These mixes are lighter, improve drainage, and contain ingredients like composted bark and coir that retain moisture without becoming soggy. Before you buy plants, read the labels and choose varieties suited to your tested sunlight level and desired final size. For a small patio, look for 'patio' or 'container' types that stay compact and flower for many weeks. Also consider mixing upright plants for height, trailing plants for edges, and bushy plants to fill the middle. A good rule is to use one thriller, two fillers, and two spillers for a 16-inch pot. Check the plant's water needs as some, like verbena, prefer drier soil while others, like lobelia, need consistent moisture. Mixing plants with opposite care needs in one pot leads to stress. Your selection should also aim for succession blooms, choosing some early bloomers and some late-season ones so you always have colour.
Prepare the Containers and Soil Properly
Clean each pot thoroughly with a mild soap solution to remove any algae, pathogens, or leftover salts from previous plants. Let them air dry. Fill the pot with moist potting mix up to about two inches below the rim, leaving room for water to pool when you irrigate. Firmly but gently press down the soil to remove air pockets, but do not pack it hard because roots need oxygen. If you want to use a slow-release fertilizer, mix it into the soil according to the package instructions, usually about a handful per gallon of soil. Avoid placing a layer of gravel at the bottom, as it actually raises the water table, contrary to old advice. Instead, rely on the potting mix's drainage qualities. Before adding plants, make sure the soil is slightly damp, not soaking wet, so it will welcome the roots. This preparation ensures healthy root growth from the start, allowing plants to establish quickly and flower for a longer period.
Plant with Proper Spacing and Depth
Arrange your plants on top of the soil while still in their pots to decide on the most pleasing layout before digging. Set each plant so that the top of its root ball sits about one inch below the rim of the container. Then gently remove each plant from its pot, tease out any tangled roots, and place it into a hole you have made. Fill around the roots with more soil and press down lightly to eliminate air gaps. Make sure you do not plant too deep; the crown should be level with the soil surface because burying the crown can cause stem rot. After all plants are in, water thoroughly until water drains out the bottom, which settles the soil. Then add a layer of mulch, like bark or gravel, about one inch thick to retain moisture and suppress weeds. Proper spacing is vital: mature leaves should barely touch each other, so air circulates and fungal diseases are less likely. This step gives each plant its own space to grow and bloom without competition.
Plan a Watering and Maintenance Schedule
After planting, check the containers daily by sticking your finger about one inch into the soil. If it feels dry, water slowly until you see moisture come out the bottom. During hot, windy spells, you may need to water twice a day, while cloudy, cool days could allow a day between waterings. To avoid splashing soil onto leaves, use a watering can with a rose and direct water at the base. Every few weeks, apply a liquid feed diluted to half strength according to the label, especially if your slow-release fertilizer was only in the mix initially. Also, remove spent flowers regularly to encourage new blooms and pinch back leggy growth. Monitor the plants for yellow leaves or curled edges, which signal water stress or pest issues. Setting a routine helps you catch problems early and ensures your plants stay healthy and colourful through the whole summer.
Quick Reference
| Situation | Action | Why it helps |
|---|---|---|
| Your patio gets only 3 hours of direct sun in the morning | Choose shade-loving plants like fuchsia, impatiens, and lobelia that tolerate low light. | Sun-loving plants will stretch and produce few flower buds without 6+ hours of direct sunlight. |
| Water sits on the soil surface and doesn't drain after watering | Repot the plant immediately into a container with drainage holes and fresh potting mix. | Poor drainage suffocates roots and invites rot, which is fatal to most container plants. |
| You see yellowing leaves and noticed you use garden soil in your pots | Replace the garden soil with a proper container mix and ensure holes are clear. | Garden soil compacts and holds too much water, starving roots of oxygen and causing nutrient imbalance. |
Common Issues
- Leaves look pale and plants are not blooming as expected by midsummer: Feed with a balanced liquid fertilizer every two weeks and check that the plants are getting enough sun; move pots to a sunnier spot if needed.
- Soil dries out extremely fast, especially on hot days: Add a layer of mulch like bark or gravel over the soil, group pots, and consider self-watering pots or plastic liners to retain moisture.
- Lots of water runs out the bottom but the soil remains dry after watering: Soak the pot in a basin of water for 30 minutes to rehydrate the mix, then water slowly and thoroughly so the water soaks in rather than flowing out.
Advanced Tips
- Install a small drip irrigation system with a timer to maintain consistent soil moisture while you are away, reducing the risk of flowering gaps.
- Use a lightweight, reflective mulch like white gravel on dark pots to keep roots cool in full sun and reduce heat stress.
- In very hot climates, choose plants that tolerate heat like lantana or portulaca, and provide afternoon shade with a patio umbrella during peak heat.
Final Checklist
- Measure sunlight hours and choose plants that match the light conditions exactly.
- Verify every pot has adequate drainage holes and test the drainage before planting.
- Use a high-quality container potting mix, not garden soil, and add slow-release fertilizer.
- Set up a watering schedule that checks soil moisture daily and adjust feeding every few weeks.
FAQ
Can I leave my patio pots outside all year if they are not hardy?
No, most summer-flowering plants are not frost-hardy. If you live in a region with cold winters, you'll need to bring the pots indoors or insulate them with bubble wrap and place them in a sheltered spot. Check the plant label or local extension service for your hardiness zone. Before a frost, water the plants deeply because moist soil retains heat better than dry soil.
How often should I water my patio containers in the summer?
There is no set schedule because it depends on pot size, plant type, and weather. Test the top inch of soil daily; if it feels dry, water until it runs out the bottom. During hot, dry weeks, this may mean once daily, and in very windy or warm conditions, twice a day. In cool, cloudy weather you might go a day or two without watering. Remember that smaller pots dry out faster than large ones, so check them separately.
What is the best way to encourage continuous summer blooming?
The key is regular deadheading, feeding, and watering. Remove faded flowers and spent stems to redirect the plant's energy into new buds. Feed every 2 to 4 weeks with a balanced water-soluble fertilizer at half strength. Also, keep the soil evenly moist and avoid letting it dry out completely, as stress can stop flowering. Some plants benefit from a mid-summer trim to promote a fresh flush of growth.